Monday, January 26, 2015

Thank You!!!!!!!!!!!!!!!!!!!

Your Final Exam will be:
Block 3: Thursday Jan. 29th 2015
10:18-12:10

Thank you for your participation in digital photography. I hope that you continue to use digital photography as a medium. I wish you seniors, the best of luck in your endeavors and have a wonderful Spring semester. For you underclassmen, I hope to see you continue in art, as an artist cannot fail- it is a success to be one!
Good Luck on Final Exams!

Reminder:
Delete your blog if you desire

Clean out folders: Delete all folders & files

Study for final (take practice quiz over and over!)

Classroom Clean Up

(1) As we near the end of the semester you need to clean out your folders and files. If you would like to keep any of your images you'll need to either (A) Email it to yourself or (B) Store via Google Drive. When you have backed up whatever you need DELETE ALL FOLDERS & FILES, except for your final portfolio film, if you have not presented it to the class yet. Check your desktop, your downloads folder, and any misc. folder you may have stuck something.
 

(2) You may also, should you choose, DELETE YOUR BLOG.
If you delete your blog, it will no longer be available online and will be permanently removed from your list of blogs on your Blogger Dashboard.
Here's how to delete your blog:
  1. Sign in to blogger.com and access your Blogger Dashboard.
  2. Beside the blog you want to delete, click the drop-down menu to the right of the gray Post List iconBlogger post list icon & drop-down.
  3. Select Settings.
  4. Click Other (under Settings) on the left side of the page.
  5. At the top of the page under "Blog tools" click Delete blog.
  6. Click Delete this blog.


The title of the deleted blog will appear in the "Deleted blogs" section for a short time after you delete your blog. During this time period, you can click Deleted blogs on the left side of your Blogger Dashboard to see the titles of your recently deleted blogs.
Deleted blogs in dashboard

Friday, January 23, 2015

FINAL EXAM Review III

Please click on the link below, you will be directed to another practice digital photography exam- Press START when ready! The questions from these exams will be part of your final so pay attention!


IMPORTANT! Leave your score page OPEN and show me your scores before closing! Otherwise, you will have to repeat a different quiz for credit! DO NOT PRINT! Just show me the screen.

Thursday, January 22, 2015

FINAL EXAM Review II

Please click on the link below, you will be directed to another practice digital photography exam- Press START when ready! The questions from these exams will be part of your final so pay attention!


IMPORTANT! Leave your score page OPEN and show me your scores before closing! Otherwise, you will have to repeat a different quiz for credit! DO NOT PRINT! Just show me the screen.

Wednesday, January 21, 2015

FINAL EXAM Review I

Please click on the link below, you will be directed to a practice digital photography exam- Press START when ready! TAKE NOTES! You will see these questions again on your final exam on June 20th or 21st.


IMPORTANT! Leave your score page OPEN and show me your scores before closing! DO NOT PRINT. Otherwise, you will have to repeat a different quiz for credit!

Tuesday, January 20, 2015

Assignment: Final Portfolio Project

Final Portfolio Review- Digital Photography


1. Movie in Windows moviemaker

2. Mini Resume
3.  BEST images from length of class (MINIMUM 12)
4. A photographer's work that has influenced/inspired you
5. At least one “whatever” photo


Create a movie presentation with all slides of your work.
Requirements can be found in your ASSIGNMENTS folder, along with PowerPoint outlining everything you need to know. View this as often as you need.
Things you may find helpful to include:
Examples of how you improved…
Before/After’s of your “edited” or manipulated work
Music:
• All Images are to be animated
• Interior pages may run at a speed where you can say a word or two about the piece AND we have time to see it before it flashes by during the oral presentation the student isn’t rushed
• All text should be animated and staggered
• Staggering text will minimize audience reading ahead and not paying attention to ad lib’ed information


**** Portfolios are due on 1/23. You will have 4-5 minutes to present your movie to the class. You must narrate through the presentation as if we have never heard of you or seen your work. Presentations are your last Major Assessment for the course ****

Grading:

• Students may have notes but are not allowed to read from their presentation on the big screen
• Students are to speak audible
• Students are not to rush through presentation
• Students must be prepared to answer questions from the audience
• Students must include everything asked on them outline in ASSIGNMENTS folder and in class MAJOR ASSIGNMENTS folder. SAVE AS LAST_FIRST_FINAL

FINALLY, your last post ever!! POST YOUR VIDEO TO YOUR BLOG AS SEEN IN THE EXAMPLES HERE
Nicole Anjali  Tina Anum

Post videos

There are several ways to post a video to your blog. .
  1. Click the black and white clapboard icon on the Post Editor toolbar.


  2. In the popup window, you'll see four options:
    • Upload: You can browse for a upload a video from your computer. If this is your first video upload, you must agree to the Terms and Conditions.
    • From YouTube: You can search YouTube and select a video to display on your blog.
    • My YouTube videos:If you have your own videos under you Google Account, you can easily access and upload them through this tab.
    • From your phone: If you have Google+ and Android, you can download an application that will allow all the videos from your phone to upload instantly to your Google Account. You can then click From your phone and select a video from your phone to publish on your blog. All content instantly uploaded from your phone is private until you choose to share it.
  3. Select one of the options, and click upload.


Wednesday, January 14, 2015

Assignment: Alphabet Art

For your photography assignment, you will be experimenting with what we'll refer to as "Alphabet Art". Using photography, you'll be responsible for spelling out a word of your choice using black and white images. Please photograph in color and we will learn as a class how to properly convert to grayscale so as to achieve proper contrast.


Below, you'll find an example of alphabet art spelling out a word. Can you see the letters?

"K-E-N-N-E-D-Y"
  1. Choose a word, at least five letters long, and cannot be the same as any other student in the class
  2. Start photographing, take more then 1 picture for a given letter as you may find something better later in the week. Look high and wide to find your letters, they can be in the most unique places. Try your best to find natural letter forms and not have to "spell it out" yourself using found objects.
  3. Take COLOR images
  4. Upload images by Tuesday MORNING and we will, as a class, talk about color conversion.
  5. SAVE EACH IMAGE separately in a folder titled Letters, in Major assignments, no larger then 8.5x11 
  6. For POST credit, place each image on panoramic canvas much like the one above, using a black or white background color. Post to blog by Tuesday Jan.20 , titled "Alphabet Art", before you leave class.
  7. Also place a saved version of your flattened, full word in 'letters' folder as a final image.

Monday, January 12, 2015

Assignment: Dyptich with Interaction

Luiz Maurina, Dyptich "The Fighter" 2011
Thumbnail Drawings of your IDEA & model names DUE:  Tuesday 1.6.14
IMAGES DUE: Wednesday January 14th 2015
Image from Richard Vantielicke Series

1. Read the artist statement & View the work of artist Richard Vantielcke below in your Major Assignments folder, or click on link - interactive images by Richard Vantielicke
Image from Richard Vantielicke Series
Start formulating an idea, and choose your model or models. It does not have to be someone from our class. It can also be someone from home. You will have Tuesday  - Friday to shoot this assignment. If you are absent, you will still be responsible for the shoot. You will have to set up your own makeshift studio at home, with a sheet and a window for light. The specific days will be assigned.
A final diptych series (4 shots total, 2 pairs) in which one half of the diptych “interacts” with the other either by theme, movement, message or concept.

Save as Last_First_Dyptich1, Dyptich2, etc. in MAJOR folder
Dave Kimelberg is a Boston-based photographer, lawyer and general creative-type photographing tatooed professionals proving, at the very least, you should not judge a book by it's cover.
Shubani Singh, Dyptich 2011

Elisa Sapolinick, Dyptich 2011
Shooting Schedule:
Shooting Schedule:
THURSDAY:
MORGAN, JUSTIN M
NIETO, VERONIKA MARIE
PINEDA, LORENZO
QADEER, AKIF
SOPER, RANCE
SYLVESTER, MATTHEW
WEAVER, ASHLEY

LYONS, MORGAN
MORALES, LIZBETH
ASLAM, MAARIA


FRIDAY:

ANDERSON-GRIFFITH, JESSICA
 DE LEON, ANTHONY
 DROZDZEWICZ, VERONICA
ESTRELLA, JONATHAN
GENAO, REBECCA
GUEVARA, GISELL ANAHI

JIMENEZ, JASON
KNUDSEN, CASSIDY

BOZEK, PATRYCJA
BUCHER, BRIAN
DALERTA, ELISSA
DAVIS, DEANNA

Wednesday, January 7, 2015

Assignment: Creating a business card

 As a student (or photographer!) you share many of the same attributes of someone in the business world. You may meet people in the course of a day whom you do not know and who do not know you.It is not always possible to spend a great deal of time talking with and getting to know the people you meet. Even when you do have time to talk, people are not always going to remember everything they learned about you.
People you see everyday — teachers, other students, parents, and family members — may not know things about you that you'd like them to know. When business people meet they exchange business cards. These small pieces of paper usually contain a person's name, the name of their business, and a title or description of the work they do, and a way to contact the person, such as a phone number or address.

Task:

Create a business card for yourself. Your card should help others know and remember you. Ideally it should convey a sense of who you are, what you do, or your interests — cheerleader, history buff, teacher's assistant, class president, hall monitor, avid reader, or a photographer!
A business card generally focuses on a single facet of an individual or business. You may be a cheerleader who also raises rabbits and tutors younger students afterschool. Create a business card for just one of those aspects of your school life or extracurricular activities, or the life you WANT to lead when you are out of school.


Checklist:

Many of the items in this list are optional. You must decide which ones are appropriate for your business card.
  • Name of Individual.
  • Name of Business or Organization.
  • Address.
  • Phone Number.
  • Fax Number.
  • Email Address.
  • Web Page or Social Media Address (Twitter, Facebook, etc.).
  • Job Title of Individual.
  • Tagline or description of Business or Organization.
  • Logo.
  • Graphic Image(s) (including purely decorative elements).
  • List of services or products.
The items listed below are to aid in designing your business card. Some may not apply.
  • Horizontal or Vertical Layout.
  • Emphasis on Business or Organization (name and/or logo).
  • Emphasis on Individual.
  • Emphasis on Title of Individual.
  • Emphasis on a particular part of the contact information (phone, address, email, etc.)
  • Size of Logo or other graphics — large (dominant) or small, etc.
  • Number of Colors.
  • White space (blank spaces) toward the middle or toward the outer edges.
  • Conservative typeface (such as those used in the stories in your textbooks) or Fun, Informal typeface (such as crooked letters, funny shapes, odd sizes, or type that looks like handwriting) or a mix.
  • SEE ALSO 11 Parts of A Business Card


Steps:

  1. First, decide what you want your business card to tell others. Do you want to focus on your activities with the Art Club or do you want to announce that you are class leader or that you are a skateboard enthusiast? It may help to list everything about yourself then pick one topic.
  2. Describe yourself. After deciding on what aspect of your school life or activities that you want to focus, make a list or write a description that tells about that part of your life.
  3. Decide if you want a "serious" or formal card or something more light-hearted or informal.
  4. Using the Business Card Checklist, list the major components of your business card. Mark out any components you wish to omit from your card. If appropriate, come up with a title for yourself. To put everything you want on this small card you may need to come up with different ways to say the same thing. Look for shorter words in place of long ones. Use a single word in place of two or three different ones. Experiment with abbreviations.
  5. Look at sample business cards. Identify those that have a style you might like to imitate or borrow, but DO NOT PLAGARIZE!
  6. Sketch out some rough ideas of how you want your business card to look — including any graphics you think you want to include.
  7. Using Photoshop, create a new Jpeg file, sized according to the specs below, 300 resolution, and 'transfer' your rough sketches to the computer. 
  8. POST final buisness card design (front AND back if you have a back) on to blog


Evaluation:

When POSTing your card, attach the following questions to the post with your answers.
  1. What is the focal point of this business card? (What part is supposed to catch the reader's eye first?) 
  2. What job, role, or activity does this business card describe? 
  3. Is this supposed to be a formal (serious) or informal (casual) business card?

Tuesday, January 6, 2015

What is a watermark?


Your Assignment: Create a Watermark, save it on a transparent layer so you can use it again, as well as pasting it to one of your photos. POST your watermarked photo on your blog.  Here is Example 1 of how I use watermarks as well as a second Example 2.


Question: What is a watermark? How can I add a watermark to my photos?
Adding a visible watermark is a common way of identifying images and protecting them from unauthorized use online. Today, you're going to create an effective watermark and apply it to your digital photos or art work.
 
Answer: A watermark is a visible embedded overlay on a digital photo consisting of text, a logo, or a copyright notice. The purpose of a watermark is to identify the work and discourage its unauthorized use. Though a visible watermark can't prevent unauthorized use, it makes it more difficult for those who may want to claim someone else's photo or art work as their own.


Tips for Effective Watermarking

If you are going to use a watermark, care should be taken to ensure that the watermark is effective, not only for proving that an image was modified, but also for educating the would-be pirates about copyright and ownership. Ideally, the watermark should be a copyright symbol along with the name of the owner, and the URL of the owner's web site, if applicable. This not only conveys the message of copyright, but it gives others an opportunity to contact the original owner of the image. Watermark placement can be a bit of a balancing act. The watermark should be placed carefully so as not to detract from the image too much, but you also don't want to place the watermark in a area of solid color or a textured area where removal would be easy to conceal. The example on this page was designed to show an extreme example of watermarking and would be is far too distracting for a portfolio photograph. In practice, the watermark should make up a smaller percentage of the overall image area compared to this example.

How to Watermark Your Photos

So now that we've discussed what a watermark is and how to make them effective, you may be wondering how to put a watermark in your images. There are many methods for watermarking photos. We'll use Photoshop for today's purposes. Please open the program and open the tutorial in your Photoshop folder, watch the video in this post OR find an online tutorial that is easier for you to follow.
 
 
POST YOUR COMPLETED WATERMARKED PHOTOGRAPH TO YOUR BLOG FOR CREDIT FOR TODAY'S CLASSWORK.

Monday, December 22, 2014

Assignment: Analyzing Motion Pictures


Analyzing Motion Pictures


O B S E RV E
 identify and note details.
Sample Questions:
Describe what you see and hear. · What do you notice first? · Do you only see live action, or are there any special effects or animation? · Describe any words you see on the screen. · What do you
notice about the length of the motion picture? ·Does anything about it seem strange or unusual? ·
What other details do you notice?


R E F L E C T
Generate and test hypotheses about the source. What was the purpose of this motion picture? · Who do you think created it? · Who are the people who appear in it? · What tools and materials were used
to create it? · Do you think it was filmed on location, or was there a stage set? · Who do you think was the intended audience? · What feelings or ideas do
you think its creators wanted to communicate? · If someone created this motion picture rofessionally today, what
would be different?


Q U E S T I O N
Ask questions to lead to more observations and reflections.
What do you wonder about...
who? · what? · when? · where? · why? · how?


Speculate about the purpose of the motion picture and what its
creators expected it to accomplish. Do you think the motion picture
achieved their goals? Explain why you think so.

Monday, December 15, 2014

Stop Motion Film: Editing in Movie Maker


EDITING 


1. Use a program such as Movie Maker 

2. Connect the camera and download images 

3. Open new Project 

4. Click and Drag clips down to the storyboard 

5. Click onto the first frame; press the play button on the preview screen 

6. To insert Title Frame 

7. Tool in the menu Bar, choose add title and credits. Choose Title. Change the font and color by the corresponding 

icons. Make the title larger. You may also change the background color. 

8. Change the Title Animation 

9. To insert Credits Frame 

a. Tool in the menu Bar, choose add title and credits. Choose Credits. 

b. In the top rectangle: Type: Created By, Produced By, or something you come up with. 

c. The boxes on the left will be in Large Font and the boxes on the right will be a small font. This is where 

10. To edit clips: 

a. Select the Timeline view 

b. Preview Window: Press play and the desired spot to "cut" the clip press the pause button- you may 

c. Press the CUT button 

d. Press play to continue to the end of this section that is to be cut. 

e. Press pause to stop and press the CUT button again. 

f. On the timeline, click onto the "Cut" clip section to select it. Right click and select Cut from the menu. The 

g. Repeat until all the unwanted sections are cut out of the timeline. 

11. You may press play and watch the whole video throughout this process as many times as you want or need. 

you type Characters by: Joe P. (no last names) etc. 

rewind the clip to the perfect spot if you do not press pause fast enough. 

section is gone. 

FINAL PROCEDURES and PRESENTATION 

Save As Movie 

1. All short films should be submitted by instructor through Google classroom.

Tuesday, December 9, 2014

Monday, December 8, 2014

Stop Motion Film: ready to shoot?!

BACKGROUNDS
1. Choose one or more backgrounds that will be used throughout the entire story.
2. Create a background for the set using mat board and acrylic or tempera paint or find a location suitable for filming
 
 
PROPS
1. Collect and bring in props to be used on the set.
2. Make additional props to be used on the set.
Character Requirements for Claymation/Small Scale Figures:
 Fits the theme
 Characters are 3 to 4 inches tall or long
 Expressive facial features
 Character is easily movable
 Character stays together throughout the unit
 
 
SET CONSTRUCTION
1. Set up the background
2. Attach any movable part(s) to the background i.e., clouds, birds.
3. Arrange the props for filming
4. Place the characters in their beginning pose.


FILMING YOUR ANIMATION
1. Using a digital camera or smart phone, take a photo or 3 second shot of your characters in the beginning pose.
2. Slightly move the characters and possible the movable background parts.
3. Again take a photo or 3 seconds of digital video.
4. Continue this process to capture the story’s theme.
5. At least 50 photos should be shot.


Friday, December 5, 2014

False Advertising: Photo Walk

Please read this short article before we leave! 


Let's see if you can identify with false advertising today! 
 
Post a photo from today's walk, side by side with an advertisement from that business. Write briefly how advertisements are not always what they seem.

Wednesday, December 3, 2014

Stop Motion Film: Windows Movie Maker

 
1. Open WMM. Open the program called "Windows Movie Maker" that's in your start menu. If you don't already know this software, then you should read a little about How to use it.Go to run(win+R) and type 'moviemk' to run it.
 
2. Import the pictures. Import the series of pictures that you want to make into a stop motion film.
 
 
3. Arrange pictures. Arrange them how you think they should be in your movie. Since a stop motion film are a combination of many pictures, this step might take a while.


4. Add in and be creative! Add music or audio, title, subtitle and end text if you want to.


Watch it all at once if you prefer to learn this way....


Now, you try!

Tuesday, December 2, 2014

Stop Motion Film: Tips for Making


Creating a stopped motion piece is the perfect way to unite your inner photographer and videographer through a trendy and fun medium. Blending the creativity of photography with the motion of video, stopped motion brings hundreds and thousands of images together to tell a sequential story.
 
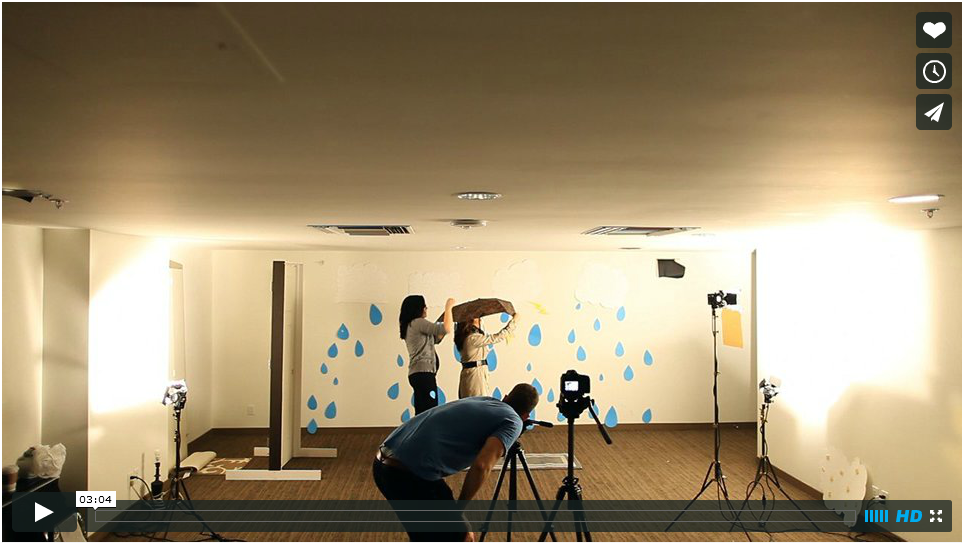
 CLICK HERE FOR BEHIND THE SCENES VIDEO
http://vimeo.com/67537975

Here are some tips for creating a stopped motion piece.

1. Brainstorm your visuals

Through stopped motion you have thousands of images to shoot, but you need to place the same kind of focus you had with one image, and apply it to many. It is probably helpful to discuss an “image” as a “scene”. So, in a movie, every element in a scene is important right? Each element helps to describe the story, thus making it stronger. Same principle is applied in the elements of a photo. Same principle is applied in stopped motion.
For these visuals, your story needs to be extremely strong. And by story, I mean, “series of images”. Just like in video you create a flow of progression from the “scenes” of your story, your “scenes” also must create a progression.

2. Create a storyboard for your stopped motion piece

If you go into stopped motion creation without planning and storyboarding, you will be sunk with a l.o.t. of time in post processing. In video, the medium is in clips. But in photo, the medium is in single images. Unless you have thought out what elements and scenes you want in your piece, you will have the unfortunate experience of sorting through thousands of individual photos to try and put the piece together. Take my advice. It is challenging enough to work with thousands of individual photo’s when you have your piece planned out. Without a plan, you will be left with trying to sort through what series of photo’s to move where, etc. etc. and it’s just incredibly complicated. So don’t do that. Story board.
I’m sure you’ve heard enough about storyboarding from the great “making of” specials on different movies, but practically, how do you dissect a story board?
  • Start with a script. You must k.n.o.w. what you want to communicate. Sometimes it’s easier to start this in writing. Write a story just like any other. Intro, which explains the characters and the core of the film. The development, in which more elements are introduced to further complicate or challenge what already existed. And then the conclusion and resolution of story and all it’s elements where your audience can take away the final message.
  • Mentally visualize your story. What visual elements create the intro, the development, and the conclusion? Will you need to alternate between wide angle and detail shots? Remember, the point of stopped motion is to literally CATCH MOTION. The series of HOW you catch that motion is what you need to visualize.

3. Shoot to NOT edit

The point of a stopped motion piece is not individual photos. The point is multiple image series capturing motion. You don’t have the time to edit each individual shot. You will be editing the series – culling and placing them into a timeline.This means that unless you “shoot to kill” you are going to be wasting a lot of time simply because you didn’t get it right the first time. Now, this is not to say that you don’t have the freedom to make artistic edits, but remember it is going to add more time. Using Imovie, Windows Movie Maker, or Final Cut Express will give you a variety of editing options for your disposal.


4. Add audio to give emotion and connect the story

Audio isn’t the main point of a stopped motion film, but it most certainly can strengthen the piece by magnanimous proportions. Sometimes the audio will simply be music. Sometimes it will be sounds. Sometimes it will be narration. Sometimes it will be all three. It truly just depends on the scope of the project. Sometimes it is easier to start with audio and add visuals, but it can be much simpler to plan audio when nearing the completion of visual assembling. Then I can determine how much audio to bring in and what the feel of it ought to be.

Stop Motion Film: The Details

INSTRUCTIONS FOR STOP-MOTION SHORT FILM:


STORY BOARD
1. Create a simple storyboard of eight to ten pictures that will be the main story of your film.
2. Keep the story board simple using stick "people". (use as many copies as necessary)
3. The storyboard should also have the parts of the background that will be in motion, i.e. clouds.
 
 
BACKGROUNDS
1. Choose one or more backgrounds that will be used throughout the entire story.
2. Create a background for the set using mat board and acrylic or tempera paint or find a location suitable for filming
 
 
PROPS
1. Collect and bring in props to be used on the set.
2. Make additional props to be used on the set.
Character Requirements for Claymation/Small Scale Figures:
 Fits the theme
 Characters are 3 to 4 inches tall or long
 Expressive facial features
 Character is easily movable
 Character stays together throughout the unit
 
 
SET CONSTRUCTION
1. Set up the background
2. Attach any movable part(s) to the background i.e., clouds, birds.
3. Arrange the props for filming
4. Place the characters in their beginning pose.


FILMING YOUR ANIMATION
1. Using a digital camera or smart phone, take a photo or 3 second shot of your characters in the beginning pose.
2. Slightly move the characters and possible the movable background parts.
3. Again take a photo or 3 seconds of digital video.
4. Continue this process to capture the story’s theme.
5. At least 50 photos should be shot.